Lenove unveils three dual-core Android tablets

Lenovo has launched the LePad S2005, S2007 and S2010 tablets in Beijing. As their name, three tablets have a size screen from 5" to 10.1". Specially, LePad S2005 has a voice call feature so the same confusing is it a phone or a tablet space as Dell's Streak 5 and the Samsung Galaxy Note.

LePad S2005:
Alias: IdeaTab S2005
PROCESSOR: Qualcomm Snapdragon MSM8260 dual-core, Clock speed 1.2GHz
GPU: Qualcomm Adreno 220
Display: 5", Resolution 800 x 480 pixel
RAM: 1GB
Internal Storage: 8GB (Supported external type microHD)
Camera: 5mp (font camera 1.3mp)
Connectivity: Bluetooth 3.0, WiFi, 3G
Port: micro USB, micro HDMI
Pin: 1680 mAh
Operating System: Android 2.3 Gingerbread

LePad S2007:
Processor: Qualcomm Snapdragon lõi kép, xung nhịp 1.5GHz
GPU: Qualcomm Adreno 220
Display: LCD IPS 7", độ phân giải 1280 x 800 pixel
RAM: 1GB
Internal Storage: 16GB (Support external type microHD)
Camera: 8mp (Font camera 1.3mp)
Connectivity: Bluetooth 3.0, WiFi, 3G
Port: micro USB, micro HDMI
Pin: 3780 mAh
Operating System: Android 3.2 Honeycomb

LePad S2010:
Processor: Qualcomm Snapdragon lõi kép, xung nhịp 1.5GHz
GPU: Qualcomm Adreno 220
Display: LCD IPS 10.1", độ phân giải 1280 x 800 pixel
RAM: 1GB
Internal Storage: 16GB (Support microHD)
Camera: 8mp (Font camera 1.3mp)
Connectivity: Bluetooth 3.0, WiFi, 3G
Port: micro USB, micro HDMI
Pin: 7560mAh
Operating System: Android 3.2 Honeycomb
loading...

Update Amazon Kindle Fire to Version 6.2

Amazon has just released a minor firmware update for Kindle Fire . If you have a Kindle Fire  you can instantly upgrade a new firmware.

There are two ways in which you can update Kindle Fire to 6.2 which are Manual Update and automatic update.

First, you can take the backup of the existing files on your tablet and then proceed.

Update via Automatic Update

To update Kindle via automatic method you must have a Wireless connection and make sure your battery is full charged. If you are not having any Wireless connection then you should opt for manual update.

Tap the Quick Settings icon located in the upper right corner of your handset and then tap on to “Sync“.
The software update file will be automatically be downloaded in the background and it will be applied automatically.

Update via Manual Update

You need to download the Software update 6.2 on your computer.

Now using the USB cable connect one end to Amazon Kindle Fire and other end to the USB port of your PC. As soon as you connect the Windows 7 PC will automatically download the respective drivers and make the device ready for use.


Once that is done you will find a seperate drive on to your Windows parallel to other drives. It will be named as ‘Kindle’ by default.


Now copy the download software file from your PC to the Kindleupdate folder on your Kindle Drive.


Check whether the file is transferred correctly on to your device. Upon successful confirmation, you need to disconnect the USB cable from your Kindle Fire and on your PC which can be easily done by removing the USB cable connection.

Ensuring that the battery is fully charged, you are now ready to proceed with the software update. To proceed, you should tap on the Quick Settings icon located on the top right corner of your screen and then tap on ‘More..’ followed by Device.

Now select “Update Your Kindle” and your tablet will restart twice during the process of the firmware update.

Once the update is completed the device will display “Current Version : 6.2“.
loading...

Easiest method to root and unroot any android devices

Recently, DooMLoRD who is a member of XDA developers generates a procedure of rooting and unrooting the phone that is perhaps common for all android devices.

This method is working on the following devices:
Sony Xperia X10 (GB firmware)
Sony Xperia Arc (.42 firmware)
Sony Xperia Arc S
Sony Xperia Play [R800i/R800x]
Sony Xperia Ray
Sony Xperia Neo
Sony Xperia Mini
Sony Xperia Mini Pro
Sony Xperia Pro
Sony Xperia Active
NTT Docomo Xperia ARCO SO-02C
Samsung Galaxy S2 [GT-i9100/GT-9100P]
Samsung Galaxy S II for T-Mobile (SGH-T989)
Samsung Galaxy S II for AT&T (SGH-I777), Skyrocket (SGH-i727)
Samsung Galaxy S II LTE Rogers Canada (SGH-I727R), Android version 2.3.5, Baseband version I727RUXKJ7
Samsung Galaxy S II Epic 4g Touch
Samsung Galaxy S2 HD LTE (SHV-E120S)(korea)
Samsung Galaxy i9100G
Samsung Galaxy S [i9000B] & [i9000 2.3.3 (PDA I9000BOJV8, Phone I9000XXJVO, CSC I9000GDTMJV7) and german T-Mobile branding]
Samsung Galaxy S Plus (GT-I9001) OS 2.3.3 and 2.3.6 (I9001ZSKP6)
Samsung Galaxy Mini GT-S5570 (GB only)
Samsung Galaxy Mini Pro i5510
Samsung Galaxy W [i8150]
Samsung Galaxy Y
Samsung Galaxy Tab [P1000] (2.3.3 firmware), [P1000N]
Samsung Galaxy Note [N7000]
Samsung Galaxy Player YP-G70 2.3.5 (GINGERBREAD.XXKPF)
Samsung Galaxy Ace (2.3.3, 2.3.4 firmware)
Samsung Nexus S [i9023] (2.3.6)
Samsung Nexus S 4G 2.3.7
Samsung Galaxy Nexus S [i9020] (2.3.6)
Samsung Exhibit (SGH-T759)
Samsung Exhibit 4G (SGH-T759) (2.3.3) Build UVKE8
Samsung Captivate i897 UCKH3
Motorola Milestone 3 [ME863 HK]
Motorola XT860, Bell XT860
Motorola Defy+
Motorola Droid X sys ver 4.5.605 w/ gingerbread
Motorola Droid X2 (2.3.4) Sys ver 1.3.380.MB870.Verizon.en.US Build 4.5.1A-DTN-150-30
Motorola XT883 (China Telecom)
Motorola XT862 (Verizon Droid3)
Motorola DROID RAZR
Nexus One (2.3.6 stock)
LG Revolution
Vizio VTAB1008 Tablet
Huawei IDEOS U8150 (2.2)

To root and unroot you do the steps below. I suggest you should  visit official xda thread before doing anything with your phone.

A. Rooting

1. First you download tool to root below :

Easy ROOTING Toolkit from HERE

2. Before rooting your android phone make sure you have :

Installed adb drivers for your phone.
Now go to Menu > Settings > Applications and “enable unknown sources


Also enable "USB DEBUGGING" by going to Menu > Settings > Applications > Development


Note: Increase screen timeout to 10 minutes, so you can see what’s happening connect your phone to pc with help of usb cable 

3. Rooting your android phone with easy rooting toolkit

Extract rooting kit to any safe place like desktop


Double click on “runme.bat” on the extracted folder.


It will run rooting script and you will see a command prompt like below


4. Connect your phone to PC 

Once your phone successfully connected to pc, hit any key to start rooting. It will complete in few seconds . During this process don’t close command prompt or don’t disconnect your phone. Completed, your phone will reboot, and “ALL DONE!!” message will appear in command prompt that means your phone rooted successfully

Now you can press any key to close it

Congratulations you have successfully rooted your android phone 

B. Unrooting

Note: unroot only if you rooted your phone with above method otherwise it can damage your phone.

1. First Download:

2. Procedure to Unroot your phone

  • Unzip the above downloaded file named “UNROOTING SCRIPT v1.0”.
  • Now open the extracted folder and launch the file named “RUNME-UNROOT.bat”.
  • Now follow the on screen instructions.
Warning: Performing the unroot procedure again and again is on your own risk.
loading...

Backup Android Phone

When you upgrade rom, kennel or root devices you will, you will lost your almost important data, settings and applications. So before do this we have to backup all of our data.


To Backup please following all steps of this guide:

I). Backing up phone data and phone apps backup

You can choose some apps below to backup a part or all of your data and apps: 
SMS Messages – Use “SMS Backup & Restore app
Contacts Stored in Phone MemorySync with the Gmail application
Videos, Images, Videos & Files etc.– Copy to internal / External SD Card

Android Cloud Storage:


This one is free and android’s native backup option provided by Google. this option is only available on android 2.2 or later. You can find it on your phone via going to settings > privacy. When you enable this option it will sync your installed applications, wi-fi settings and wallpapers. There is also an option available “automatic restore”. It backups saved application data, such as game progress or app settings. When you sign in with your Google account on new device, it automatically restore your data. It will apply all your settings and restores all installed applications. But this default feature is not complete solution due to its limitations. If you are running android 2.2 later version with manufacturer with custom shell , it is not possible to backup because manufacturer block permission for Google 
It didn’t backup apps your all applications in attempt to thwart piracy 
It will only back up apps whose developers have specifically enabled that capability

My Backup pro:

MyBackup Pro , this application is a premium solution .It is available for $4.60 from android market and it is one of the best. It will allow you to back up almost everything, such as your applications (also those that are not supported by Google’s backup ), contacts, SMS/MMS messages, alarms,bookmarks, user dictionary. it can also backup homescreen widgets and shortcuts.

It is very simple to use, when you start this app it will ask you to backup application,other data. It has two option to store backup first is on SD card and second mybackuppro’s secure servers. it also let you schedule backups.

Titanium backup:

This application is available both free and paid versions ($US6.14). Just unlike mybackup pro it requires root permissions and it can backup restricted application by system as well. In short it can backup absolutely everything. It is not only a backup application but also includes tools useful for rooted devices, such as file encryption, ROM management, application version freezing, and an experimental bloatware exterminator for uninstalling pre-installed softwares.

If you want to restore backup created but titanium backup then it is fine but if you have a new device to restore , then it can be problematic . because rooting method of different devices are different and can take long time to discover.

The guide use this app here

II). Backing up APN settings

To backup these settings you can go to Applications > Settings > Wireless and Network > Mobile Networks > Access Point Names
loading...

Backup/Restore Android by Titanium Backup

In this article, I will guide you use a great application named Titanium Backup.

This application is available both free and paid versions ($US6.14). 

Key feature of “Titanium Backup
  • Backup of every app with its associated data. 
  • Backup of every app with its system settings. 
  • Contacts and card backup.
1. Installing Titanium backup
First, enable unknown source in application settings (settings>applications). After that root your phone and now you can install titanium backup on your device via android market


When you will run it , allow root permissions to it via superuser.


2. Creating first Titanium backup
  • Open Titanium backup app. 
  • Tap on the Backup/Restore tab in home screen of “Titanium Backup-All”.

In this portion press menu button of phone. Now a slide pop -up menu is appear, select batch from this.


The batch menu is appearing. Now choose “[RUN] Backup all users apps+ system data”.


Above menu is appear where we have two option one is “Exclude active apps” where we can uncheck to particular apps which apps data is not needed for creating backup. And other is “Kill active apps” which select all of them.


Now choose kill active apps. And tap on the button “Run the batch operation”. 
Now the Backup process is started and takes some time to complete.


When process is completed the Backup and Restore menu is again appear. Here some smiley faces, caution triangle and check marks are right after the apps appears. For more tap menu and click on legend from the pop-up window.


Except smiley faces and check marks there were caution triangles are the sign of missing backups so run the batch again until all becomes in smiley and checked. 
Now it’s completed. We are suggested you to safe a copy of this backup in your PC by copying TitaniumBackup Folder from SD card to PC. 

3. Scheduling Titanium backups
It’s happen by choosing the “Schedules” tab in Titanium home screen.

4. Restoring Titanium backups
Go to the batch menu in which we go earlier. Now select your suitable option from the “Restore” Header.


Like if we want to restore angry bird unlocked levels that have miss then for an individual app hit on the top option.

That’s all is about the use of Titanium Backup app in your android phone
loading...

Kindle Fire best selling product on Black Friday

Amazon's not talking specifics, but the company just issued a breathless press release calling Black Friday the "best ever for the Kindle family" while noting that the Kindle Fire has remained the "bestselling product across all of Amazon since its introduction 8 weeks ago," on September 28th.
Amazon, a company that never talks about exact Kindle sales figures, says that it sold "millions" of the new Kindle family even before Black Friday. And this past Friday, Amazon says it sold four times as many Kindles as it did on Black Friday 2010, "and last year was a great year."
The release does offer some context in lieu of actual numbers. Target, which also sells Apple's iPad, says that the Kindle Fire was the bestselling tablet in its stores on Black Friday. We'd say that's a pretty good start for an Android tablet given the platform's inability to overcome Apple's juggernaut on the category since the iPad redefined it in April of 2010.
loading...

LG announces Android 4.0 ICS upgrade plans


On the Facebook Page, LG has announced the upgrade roadmap for their devices. The lucky devices are LG Optimus 3DOptimus 2XOptimus Black and Optimus LTE.  

LG also promises it is exploring its options for bringing the Android 4.0 to some older Optimus smartphones too. So there is a tiny chance the Optimus One and Optimus Chic might get some Ice Cream Sandwich treatment as well.
loading...

LG Optimus 3D Tutorial: How to update Gingerbread 2.3.5

LG has officially released Android 2.3.5 Gingerbread update for its Optimus 3D smartphone. This article will instruct how to update Gingerbread 2.3.5 for Optimus 3D.

You need download:

ROMS: Official GB V21A:
Or 

If you has updated the basebane you can download this file and uprom by Recover mode

If you hasn't updated basebane,  use method below to upade new ROM

Step 1. Install "B2CAppSetup.exe", then open LGMobile update.


Click Install Driver


Step 2. Connect Optimus with PC in the "debug" mode and wait until conpleted installing drivers.
(to active USB Debug mode: go to menu/settings/application/development/USB debugging)

Install msxml.msi in the downloaded directory.

Open windows enabler.exe file, the system tray icon has its icon, click it to turn on.


Step 3. Open "UpTestEX_mod2_marwin.exe" file, choose the path of ROM KDZ file.
Select "emeregency" and "3gQCT" as the figure and then click on the "NORMALL WEB UPGRADE TEST"


Completed and Enjoy : D
loading...

Samsung Galaxy Tab 10.1 Tutorial: Reading Google Books Offline

Recently, I wrote a post about how to access Picasa Web Pictures on Galaxy Tab. Today, I will guide you access offline other Google's sevice that is Google Books. Below it's processing:

Step 1. Open the Google Books application and search Books that you want to read while offline.

Step 2. Press and hold on the book's cover. A small menu will pop up.

Step 3. Select "Make avaiable offline"


Step 4. You can add more other books by pressing the small drawing-pin under each book's cover.

Step 5. Once finished, press the "Done" button in the lower right corner.


You can see how much space you have available for downloads during the book selection. 
And it's OK to pick all titles, as long as you have the space.
loading...

Samsung Galaxy Tab 10.1 Tutorial: Access Picasa Web Pictures Offline

Galaxy Tab has a interesting feature that allows Accessing Picasa Web Pictures Offline. To do this just simple go to Gallery.
Now in your Gallery click on ‘All Albums’ and you would be seeing your camera pictures, screen captures and Picasa web album integrated. The photos from Picasa Web album are easily recognized with the Picasa logo shown on the album name.0
Tap on the top right corner and among the available options choose ‘Make available offline‘.


Once you have done that you would see ‘pin point‘ on each album cover image.


Now tap on each pin point to save the copy of those images on to your Galaxy TAB. As soon as you tap on the icon the image would be caching on to your tablet. You can select as many album as you want and a copy of all those picture would be saved on to your Galaxy TAB internal memory.
loading...

Samsung Galaxy Tab 10.1 WiFi Tutorial: Enable Adhoc Wifi, Overclock, Install Ubuntu on Galaxy Tab 10.1, Accessory

You should read this post before begin

I. Enable Adhoc Wifi

Step 1. Download adhoctablets.zip and unzip to the root folder of your hard disk such as c:\adhoctablets.

Step 2. Put your Android tablet into USB Debugging Mode by going to Settings->Applications->Development.

Step 3. Open up a command prompt by typing “cmd” under Start->Search for Windows or open up a shell in Linux or Mac.

Step 4. Browse to the directory you unzipped adhoctablets.zip.  For Windows, type:
cd \adhoctablets
Then type this to enter shell:
adb shell
For Linux:
adb-linux shell
For Mac:
adb-mac shell
Then type:
su
mount -o rw,remount -t yaffs2 /dev/block/mtdblock3 /system
cp /system/bin/wpa_supplicant /sdcard/wpa_supplicant.original
cp /sdcard/wpa_supplicant /system/bin/.
chmod 755 /system/bin/wpa_supplicant
chown system.wifi /data/misc/wifi/wpa_supplicant.conf
exit

Reboot your tablet and you should now be able to connect to Adhoc wireless devices.
If something goes wrong, you can get back into adb shell and type the following to revert:

su

mount -o rw,remount -t yaffs2 /dev/block/mtdblock3 /system

cp /sdcard/wpa_supplicant.original /system/bin/.
chmod 755 /system/bin/wpa_supplicant
chown system.wifi /data/misc/wifi/wpa_supplicant.conf
exit

II. Overclock your Galaxy Tab 10.1 to 1.4Ghz
You will need to download the following kernel zip file and copy over to the root directory of your Tab 10.1's internal storage.
Next, reboot into Recovery from ROM Manager.
Once in ClockworkMod Recovery, simply zip the file you copied over earlier via “Install zip from /sdcard”.
Reboot, then download latest version of setCPU (you can also donate by buying on the Market), unzip the zip file, and install it using a file manager app such as the free AndroZip, available at the Market.

III. Install Ubuntu on Galaxy Tab 10.1
Step 1. Root your GT 10.1 (see here)
Step 2. Download Files you will need
If you don’t have Android SDK, just download this adb.zip, unzip it, and put it in the root folder of your computer. E.g. Windows, put it in c:\ so you will have c:\adb directory. For other operating systems, you can get ADB by downloading the Android SDK  for your appropriate operating system.
And you need to download busybox files:
Step 3. Install Busybox on Galaxy Tab 10.1
If you’ve already installed Busybox, you can skip this step.
Otherwise, you need to install Busybox on your Galaxy Tab 10.1.  Copy over the su-busybox-misc-sam-tab-10.1-061611.zip to the root folder of your Tab 10.1, run Clockwork Recovery, then flash the zip file.
Step 4. Copy Ubuntu folder into Tab 10.1!
You need to copy over the ubuntu folder you unzipped earlier over to root folder of your Galaxy Tab 10.1.
Step 5. ADB shell and Run some scripts!
Open up a command prompt/shell by typing “cmd” under Start->Search for Windows.   For Linux/Mac, open a shell.
Go into the adb directory (or your SDK directory) by typing:
cd \adb
Then type:
adb shell
You should be now in shell of your Tab 10.1, if you don’t, you didn’t install the Tab 10.1 drivers correctly. (You can download Tab 10.1 drivers  and install them.)
Next type:
cd /sdcard/ubuntu
Then type:
sh ubuntu.sh
Don’t worry if you get errors and type:
bootubuntu
If you get a Ubuntu linux shell at this point, congratulations, your Ubuntu is now running in the background of your Android!
Step 6. Install some Ubuntu packages and VNC Server for GUI!
Type:
apt-get update
to update all the packages.
*Optional – You can also install SSH access by typing:
apt-get install openssh-server
Next, let’s setup a VNC server so we can visually access our Ubuntu Gnome desktop.
Type:
apt-get install tightvncserver
to Install tightvncserver
Then type:
export USER=root
and:
vncserver -geometry 1280×800
You can set your VNC server password here.
This starts our VNC server and we can log into it using any VNC program from a computer or from our own Tab 10.1
Step 7. Login to your Ubuntu on your Galaxy Tab 10.1!
To login from your own Tab 10.1, download the free app “Android VNC Viewer” off market.
Set the IP address to “127.0.0.1?, enter the password you set earlier, then set port to 5901.
You should be now seeing the Ubuntu desktop.  If so, congratulations!
Now, you can hook up bluetooth mouse and keyboard to make it a fully-functional Ubuntu desktop.
How to Fix the Keyboard Mapping!
When you connect a bluetooth mouse, it might be a bit off, here’s how to fix it.
Type this:
cat > $HOME/.vnc/xstartup
Then copy and paste the below:

#!/bin/sh
xrdb $HOME/.Xresources
xsetroot -solid grey
#x-terminal-emulator -geometry 80×24+10+10 -ls -title “$VNCDESKTOP Desktop” &
#x-window-manager &
export XKL_XMODMAP_DISABLE=1
/etc/X11/Xsession

Then hit Ctrl+D twice and hit Enter.
Basically I added the line “export XKL_XMODMAP_DISABLE=1? before “/etc/X11/Xsession” to fix the keyboard mapping.
You can also just edit the file $HOME/.vnc/xstartup with your favorite text editor too.
*Note – You might have to reboot your device and start Ubuntu again.
Extra – How to Reboot/Restart your Ubuntu!
When you turn off your Tab 10.1 completely and reboot, you need to restart your Ubuntu if you want to use it.
Type:
adb shell
Then change directory to ubuntu:
cd /sdcard/ubuntu
Then run:
bootubuntu
Then kill instances of VNC server (just to make sure):
killall Xtightvnc
Then:
vncserver -geometry 1280×800
Make sure you use a small-case “x”, sometimes when you copy and paste, it will change!

IV.Accessory 


loading...

Samsung Galaxy Tab 10.1 WiFi Tutorial: Root/ UnRoot, Backup and Recovery

I. Rooting
First, you need download Root.zip  contained all needed files
Instructions
This method is done on Windows.

Step 1. Downloading Files and Installing Drivers
  • Download the root.zip  I have linked.
  • Extract the zip file by right clicking and selecting "Extract All," or by using an extracting program of your choice.
  • Open the folder and double click the driver file labeled "GT-p7510_USB_Driver_v1_3_2360_0-Escape.exe"
  • Install the driver. Its pretty much just Next, Next, Install, and Exit when its done.
Step 2. Connecting with the Device
  • Turn on USB Debugging by going to Settings>Applications>Development and checking USB debugging. Click Okay to confirm
  • Power off the device by holding the power button and selecting Power off
  • Put the device into Downloading mode
    • Hold the Vol Down button (the left Volume button) and then hold the Power button as well.
    • Keep holding until you see two icons. First you'll see the Samsung Galaxy Tab 10.1 logo and then the icons will show up. Let go.
    • Press the Vol Up button (the right Volume button) to select Downloading mode.
  • Connect the device to your computer with the USB cable.

Step 3. Flashing a Custom Recovery

  • Go into the same root folder as before.
  • Double click the root application named "Odin3_v1.85.exe"
  • Select PDA
  • Double click the clockworkmod recovery file labeled "recovery-cwm_4.0.0.4-sam-tab-10.1.tar.md5" to select it.
  • Click Start
  • Once it is complete, you can close the program
Step 4. Completing the Root
  • Disconnect your USB cable
  • On your device, turn off USB Debugging by going to Settings>Applications>Development and unchecking USB debugging
  • Plug your USB cable back in
  • On your computer, go to the same root folder as before and transfer the zip file labeled "Samsung_Galaxy_Tab_10.1_root.zip" to your device. Don't put it inside any folder.
  • Confirm that it was transferred by clicking inside the device folder
  • Power off the device by holding the power button and selecting Power off
  • Put the device into Recovery mode
    • Hold the Vol Down button (the left Volume button) and then hold the Power button as well.
    • Keep holding until you see two icons. First you'll see the Samsung Galaxy Tab 10.1 logo and then the icons will show up. Let go.
    • Press the Vol Down button (the left Volume button) to highlight the left icon.
    • Press the Vol Up button (the right Volume button) to select Recovery mode.
  • You should see that you are in ClockworkMod Recovery. If not, start over
  • Use the volume buttons to highlight "Install zip from SD card" and hit the Power button to select it.
  • Use the volume buttons to highlight "Choose zip from SD card" and hit the Power button to select it.
  • Use the volume buttons to highlight "Samsung_Galaxy_Tab_10.1_root.zip" and hit the Power button to select it.
  • Use the volume buttons to highlight "Yes - Install..." and hit the Power button to select it.
  • When it finishes, the last line should say "Install from sdcard complete."
  • Use the volume buttons to highlight "*****Go Back*****" and hit the Power button to select it.
  • Hit the Power button to select "reboot system now"
  • Your device will reboot
II. Backup and Recovery
Open up ROM Manager app then press on “Backup Current ROM”. You can enter the name of the backup here, I’ve added “31 rooted” after the date to mark that I am backing up my stable Android Honeycomb 3.1 ROM.


The rest should be automatic, ROM Manager app will automatically reboot into recovery, backup your current ROM, then reboot Tab 10.1.  I know, it’s so easy, it’s like stealing.
You can double-check that your ROM has been backed up by opening up ROM Manager again and hitting “Manage and Restore Backups”.  You can also restore your ROM there.


Also, this doesn’t save anything on your internal storage but does save all your settings and apps.

III. Unroot
Use ROM Manager to install the OTA ROM, this should get you rebooted back to stock.
Now, you also need to install back the stock Recovery so download this zip file and unzip:
Download tabunroot.zip
Put your Galaxy Tab 10.1 in ODIN download mode by holding down both Power Button and Volume Down button and let go when your Tab 10.1 reboots, shows Samsung logo, then 2 menus.
Hit Volume Up button and your Tab 10.1 should be in ODIN download mode.
Open up Odin3v1.85.exe program.
Choose PDA and choose the file “stockretail.tar.md5? and hit “Start”.
Reboot your Tab 10.1 by holding down the Power button, now your Galaxy Tab 10.1 is unrooted back to stock.

IV. Up Rom
Dowload Cook Rom: Choose the Rom that you love. Some source Cook Rom for GT 10.1 here:
http://galaxytabhacks.com/category/galaxy-tab-10-1-roms/
http://forum.xda-developers.com/forumdisplay.php?f=1053
Copy Rom file to root directory of GT 10.1
Press and hold the Power button, then select "Shut down"
Hold the Vol Down button (the left Volume button) and then hold the Power button as well.
Keep holding until you see two icons.
Select "ClockworkMod Recovery" (icon Recycle Bin, using Vol Down to move and Vol Up to select)
Then, select “Wipe/Factory Reset” (using Vol Down and Vol Up button to move and Power button to select)
Select "Yes"
Select "Install zip from sd card"
Select the file Room (.zip) from the root directory.
Select "Yes"
loading...

LG Optimus Pad (G-slate) Tutorial

I. Accessing Diagnostic and Recovery Modes
You should familiarize youself with this section before continuing onto root or any other modificantion that you'd like to do.

Fastboot
  • Power off the device
  • Press and hold Volume +
  • Press the Power button
  • Do not let go of the Volume + button until you see yellow letters along the top talking about fastboot mode
APX mode (nvflash)
  • Power off the device
  • Press and hold Volume +
  • Press the Power button
  • The screen will look like it's off and the device is off, plug it into your computer and it should see the device as 0995:7820 NVIDIA Corp.
MDP/Recovery/Download mode
  • Power off the device
  • Press and hold Volume +
  • Press the Power button
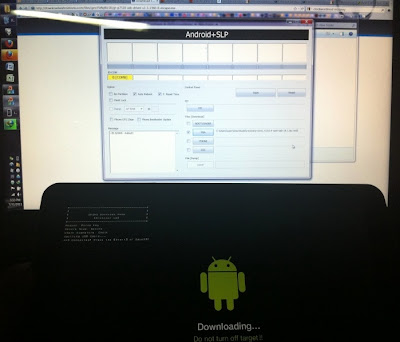
  • It will boot and a screen will pop up saying not to power the device off as it's in Download mode
Note: Fastboot mode requires 25% or more battery life, otherwise it will not accept input

II. Installing Windows Drivers
  • Download the LG drivers (http://goo.gl/QWhT4 or http://goo.gl/5mXwg)
  • Install the software package
  • Plug G-Slate into your computer via USB
  • It will ask for drivers to install, you'll need to basically browse to loacation and select the drivers we installed. The file location is: C:\Program Files\LG Electronics\LG United Mobile Driver.
  • Let it finish the install, you should now have all LG drivers installed.
III. Configuring udev Rules
This document will outline how to configure udev to work with fastboot, adb and nvflash. This will allow a "normal" user to have full access to the device using fastboot, adb and nvflash without root access.
You need to have the Ubuntu Linux 10.04+ operating systems (If you use Windows, may be installing the virtual machine; Download: VMware and Ubuntu 32 bit)

Create a new rule for udev to use:
sudo gedit /etc/udev/rules.d/99-android.rules
(Use whatever editor you'd like. I prefer vi, but for the fairness of being noob friendly, I'll do gedit.)
Insert the following code:
SUBSYSTEMS=="usb", ATTRS{idVendor}=="1004:61f9"
SUBSYSTEMS=="usb", ATTRS{idVendor}=="0955:7820"
TEST=="/var/run/ConsoleKit/database", \
RUN+="udev-acl --action=$env{action} --device=$env{DEVNAME}"
Save the file.
Reboot the computer.

IV. Configuring MTP Support
You need to configure MTP to mount the SDCARD of the G Slate automatically when plugged in to the computer.
You need:
Ubuntu Linux 10.04+
USB Cable
Terminal or Terminal Emulator
Root or Sudo access
udev Rules configured
  • Do the following in a terminal or terminal emulator.
    sudo apt-get install mtpfs
    sudo mkdir /media/gslate
    sudo chown $USER:$GROUP /media/gslate -- (YOUR USER AND USER GROUP, so: sudo chown myuser:myuser /media/gslate
    sudo gedit /etc/fstab
    Insert the following into the fstab file:
    # mount point for LG G Slate
    mtpfs /media/gslate fuse user,noauto,allow_other 0 0
  • Edit the fuse.conf to allow other users:
    sudo gedit /etc/fuse.conf
  • Uncomment the following line by removing the #:
    #user_allow_other
  • Add your user to the fuse group in the group file:
    sudo gedit /etc/group
  • Edit this line, add your user name after the last : (Colon):
    fuse:x:104:
  • Reboot your Computer.
Now when you're done booting, you should now notice a new mount labelled gslate in the Places Menu. Anytime you plug in your G Slate, it will automatically mount and launch a new window that will be mounted to /media/gslate.

V. Manually Install 3.1 Update
Note: Backup your data. If not, it's your own fault if you lose anything.
This section will describe how to install the latest patch from LG and T-Mobile, version 3.1 manually.

Downloads:
Hacky Clockwork Recovery: http://goo.gl/7MlyR or http://goo.gl/3BjkS

You need:
  • USB Cable
  • Terminal or Terminal Emulator
  • Root or Sudo access on workstation being used or udev rules configured
  • fastboot binaries (Downloads)
  • Understanding of fastboot and accessing the G Slate diag modes. (See Accessing Diag and Recover Modes)
    Understanding partition layouts (See Partitions)
Download the 3.1 OTA. (See Downloads)
Update from rooted system
Rename it to:

update.zip
Copy it to /sdcard/
Download Hacky Clockwork Recovery (See Downloads)
Untar the system-stock.tgz, use an app like 7zip or WinRar or tar or...
Download your version of nvflash. (See Downloads)
Untar the system-stock.tgz, use an app like 7zip or WinRar or tar or...
Reboot to APX mode. (See Accessing Diag and Recover Modes)
Restore your /system partition to stock: (See Restore G-Slate for more information)

nvflash --bl bootloader.bin --getpartitiontable ptable.txt
nvflash -r --format_partition 8
nvflash -r --download 8 system.img
nvflash -r --sync

Continue: Update from stock system
Reset to Fastboot mode and boot Hacky Clockwork Recovery. (See Accessing Diag and Recover Modes)
fastboot oem unlock
Then:
fastboot boot CR-hacky-recovery-v909.img
Install the update.zip:
Install ZIP from sdcard
Choose ZIP from sdcard
Media -> Update.zip
Yes - Install update.zip
Let it flash, it will take about 15 minutes, then:
Go Back
Go Back
Reboot System Now
The system will reboot to a "Downloading Now" screen. Let it finish, and it will reboot.
The initial boot can take up to 15 minutes, once it boots successfully, it will reboot one more time.
Congratulations, you have upgraded to 3.1.
If you would like to root, please see rooting for multiple options.

Note:
The OTA requires 70% or more battery life.
fastboot mode requires 25% or more battery life, otherwise it will not accept input.
Update locks the bootloader, so if you want to remain unlocked, avoid updating for now.

VI. Rooting
Note: It is highly recommended to make backups of all your applications and data before proceeding

You needd
  • Windows or Linux based system with the ADB binary installed
  • Appropriate nvflash for your OS
  • Rooted system.img (with ambiguous root method only)
  • USB Cable


A. Rooting for Android 3.0
Ambiguous Root Method [windows or Linux] - Recommended method
  • Download the Linux/Mac or Windows nvflash needed to root. (See Downloads)
  • Download the root system.img (See Downloads)
  • Untar the system-root.tgz, use an app like 7zip or WinRar or tar or...
  • Extract the needed files into a directory and cd to that directory.
  • Shut down your G-Slate and plug it into your computer via USB.
  • Hold down both volume buttons and press the power button. The G-Slate will not appear to turn on, but it'll go into APX mode.
  • Verify it recognized APX mode in Linux:
  •    lsusb
       0955:7820 NVidia Corp.
  • Windows will need to have the provided drivers installed when Windows detects the device.
  • Linux needs root if you have not setup the udev rules:
  •   sudo su
  • Run the following commands:
      Prefix nvflash with ./ in Linux and .\ in Windows.
       nvflash --bl bootloader.bin --getpartitiontable ptable.txt
       nvflash -r --read 8 system-orig.img
  • Wait while 400 meg of data copies.
  • Flash the pre-rooted system.img:
  •    nvflash -r --download 8 system.img
  • Wait while it copies back.
  • Sync the flash memory:
  •    nvflash -r --sync
  • Press the reset button under the sim cover to reboot.
B. Rooting for Android 3.1 (CWM method)
  • Make sure to have the latest LG Drivers installed. (See Installing Windows Drivers)
  • Download the root.zip (See Downloads)
  • Download the Hacky Clockwork Recovery. (See Downloads)
  • Download the correct fastboot for your OS (See Downloads)
  • Untar the CR-hacky-recovery-v909.tgz, use an app like 7zip or WinRar or tar or...
  • Boot the recovery:
  •   fastboot oem unlock
    Then:
      fastboot boot CR-hacky-recovery-v909.img
  • Install the root.zip:
  •    Install ZIP from sdcard
       Choose ZIP from sdcard
       Media -> root.zip
       Yes - Install root.zip
  • Let it flash, then:
  •    Go Back
       Go Back
       Reboot System Now
  • Congratulations, you are now rooted.
VII. Backup Data

CWM Method -- ROM Manager (Recommended Method)

Download and flash CWM Recovery (See downloads)

      fastboot flash recovery recovery.img
or
  dd if=/sdcard/recovery.img of=/dev/block/mmcblk0p5
  • Download and install Rom Manager from the market.
  • Open Rom Manger, tap Backup Current ROM
  • Name your backup set
  • Tap OK
  • Allow root permissions if needed
  • Let Rom Manager handle the rest
  • All backups are stored in:
  •   /sdcard/clockworkmod/backups/<backup_name>/
  • To restore, open Rom Manager:
  •   Manage and Restore Backups
      <backup_name>
      Restore

dd Method (Data+APK's only)

  • Make sure you are rooted. (See Rooting)
  • Make sure to have busybox installed from the Market.
  • Start a shell over adb and switch to root:
  •    adb shell
       su
  • Use dd to backup your data partition:
  •    dd if=/dev/block/mmcblk0p4 of=/sdcard/data.img
  • Store the newly created data.img in a safe place.
  • To restore your data:
  •    dd if=/sdcard/data.img of=/dev/block/mmcblk0p4
  • Reboot

MyBackup Root Method (Data+APK's Only)

  • Download mybackup root
  • Make sure to have busybox installed from the Market.
  • Change the following settings -- Open Menu -> Options:
  •    Backup Location: /sdcard
       Use root features: On
       Use BusyBox: On
       Use PM Binaries: On
       Restore Market Link: On
  • You set to backup /system apps too, if you do, do a separate backup with that and only backup the data and not the apk's.
  • Back out to the menu and select backup, tell it to backup the applications that you want. Then tell it, APK's+DATA to complete the backup.
  • Reboot
  • To restore your data, simply re-install mybackup root once you've re-installed your ROM and click restore. Make sure the app is pointing back to the same location you backed up to. It looks for the reware folder.
VIII. Guide using LG market
After the release of Optimus Pad, LG also launched LG world market include free apps and movies. If your device released by Docomo, you can download and use for free. Unfortunately, it's Japanese.
Install and register an account
IX. Buy code and Unlock

1. Checking using right limit by Docomo
Access the website: http://nw-restriction.nttdocomo.co.jp/search.php

2. Enter IMEI number
Enter the IMEI numbers of your device in the blue box and security numbers in the red box
3. Confirm
If the result show as below, it mean that your device are not using right limit by Docomo. You can unlock.
4. Buy unlock code
Buy code from this website : http://www.unlockallcellular.com/lg-optimus-pad-unlock-code-p-163646.html
Or http://sim-unlock.net/sim-lock/5/Unlock_by_code_for_any_LG/
5. Method unlock
With G-Slate of T-Mobile, you just plug in the sim and enter unlock code
With Optimus pad L-06C of Docomo, you need to do steps below
Step 1: Remove the sim out of your device, turn off Airplane mode.
Step 2: Install Launcher Pro (free version). Download here: https://market.android.com/details?id=com.fede.launcher or http://www.launcherpro.com/
Step 3: Using the SIM Unlock Test feature to enter code
Press the Home button and select Launcher Pro
Hold on the screen and select Shortcuts
Select Activities
Select Hidden Menu
Select SIM Unlock Test and make a Shortcuts on the main screen
Run SIM Unlock Test
Enter unlock code
Plug the sim and result: 
Setting the APN: Go to Settings -> Wireless & Network -> Mobile networks -> Access Point Names 
X. Accessories
loading...
All Rights Reserved Android Impress.